How to Install Chatwoot on Ubuntu 24.04 with Docker and HTTPS
Install Chatwoot on Ubuntu 24.04 with Docker Compose and a free HTTPS certificate. A pinned, reproducible setup you can run in about 20 minutes.
Chatwoot self-hosts cleanly on Ubuntu 24.04 as a small set of Docker containers — PostgreSQL, Redis, a Rails web process, and a Sidekiq background worker — with Nginx terminating HTTPS in front of them. You install a specific pinned release, v4.16.0, with Docker Compose, wire up the passwords and secrets the stock files leave blank, and put a free Let’s Encrypt certificate in front. Budget about 20 minutes on a 2 vCPU / 4 GB server.
Two decisions are where most self-hosted Chatwoot installs go wrong:
- Pin the image tag. Chatwoot’s published compose file uses
chatwoot/chatwoot:latest. On a server you plan to keep,latestmeans your nextdocker compose pullcan jump across a breaking release without warning. Pinv4.16.0and upgrade on purpose. - Fill in the blanks. That same compose file ships an empty PostgreSQL password and a blank
SECRET_KEY_BASE. Start it as-is and the database container and the Rails app fail in ways that are annoying to diagnose. You set these before the first boot.
The output blocks below are what each command prints on a clean Ubuntu 24.04 server.
Before you start
You need:
- A server running Ubuntu 24.04 with 2 vCPU and 4 GB of RAM. Chatwoot runs four services alongside its database; 2 GB is tight, so 4 GB is the sensible starting point.
- A non-root user with
sudo. Every command here is run as that user. If you are on a brand-new box, Initial Ubuntu 24.04 Server Setup: Users, SSH, Firewall covers creating the user, SSH keys, and the basics first. - A domain or subdomain you control, because HTTPS certificates are issued to a name, not an IP address. The examples use
example.com; substitute your own everywhere it appears.
A note on placeholders:
| Placeholder | Means | Example |
|---|---|---|
example.com |
the hostname Chatwoot will answer on | support.acme.co |
<...-hex> |
a random value from openssl rand -hex N; generate a fresh one for each key, never reuse |
openssl rand -hex 16 → a 32-character string |
[email protected] |
an email address you own, for the certificate’s expiry notices | [email protected] |
Step 1: Point your domain at the server
TLS certificates are issued to a hostname that resolves publicly, so this has to come first — Certbot will check it in Step 8.
In your DNS provider, create an A record for the name you want (example.com, or a subdomain such as support.example.com) pointing at your server’s public IP address. Give it a low TTL while you set things up.
Confirm it resolves before going further:
dig +short example.com
It should print the IP you pointed the record at:
203.0.113.10
If that prints your server’s IP, you are ready. If it prints nothing, DNS has not propagated yet — wait and re-run rather than pushing on, because every later step assumes the name resolves.
Step 2: Open the firewall
Chatwoot will be reached over HTTP and HTTPS, so allow those and SSH, then turn UFW on:
sudo ufw allow OpenSSH
sudo ufw allow 80/tcp
sudo ufw allow 443/tcp
sudo ufw --force enable
sudo ufw status verbose
UFW reports the rules active:
Status: active
Logging: on (low)
Default: deny (incoming), allow (outgoing), disabled (routed)
New profiles: skip

To                         Action      From
--                         ------      ----
22/tcp (OpenSSH)           ALLOW IN    Anywhere
80/tcp                     ALLOW IN    Anywhere
443/tcp                    ALLOW IN    Anywhere
22/tcp (OpenSSH (v6))      ALLOW IN    Anywhere (v6)
80/tcp (v6)                ALLOW IN    Anywhere (v6)
443/tcp (v6)               ALLOW IN    Anywhere (v6)
Port 3000, where Chatwoot itself listens, is deliberately absent — the containers bind only to 127.0.0.1, and Nginx is the only thing the outside world talks to. How to Set Up a Firewall with UFW on Ubuntu 24.04 goes deeper on UFW if you want it.
Step 3: Install Docker Engine and the Compose plugin
Use Docker’s official install script, then add your user to the docker group so you can run Docker without sudo:
curl -fsSL https://get.docker.com -o get-docker.sh
sudo sh get-docker.sh
sudo usermod -aG docker $USER
The group change only takes effect in a new login session, so log out and back in, then confirm both the engine and the Compose plugin are present:
docker --version
docker compose version
Both report a version:
Docker version 29.6.2, build dfc4efb
Docker Compose version v5.3.1
If docker still asks for sudo after logging back in, you are in an old session — disconnect fully and reconnect. Everything from here on assumes plain docker works.
Step 4: Download Chatwoot’s Compose files, pinned
Chatwoot maintains two files for a Docker deployment: a Compose file and an environment template. Pull both at the v4.16.0 tag rather than from the moving develop branch, into a project directory:
mkdir ~/chatwoot && cd ~/chatwoot
curl -fsSL https://raw.githubusercontent.com/chatwoot/chatwoot/v4.16.0/docker-compose.production.yaml -o docker-compose.yaml
curl -fsSL https://raw.githubusercontent.com/chatwoot/chatwoot/v4.16.0/.env.example -o .env
ls -la docker-compose.yaml .env
Both files are now in the directory:
-rw-rw-r-- 1 ubuntu ubuntu 10572 Jul 21 06:28 .env
-rw-rw-r-- 1 ubuntu ubuntu  1417 Jul 21 06:28 docker-compose.yaml
The official deployment guide is the upstream reference for these files; the edits that follow are what turn the generic template into something that boots on the first try.
Open docker-compose.yaml and make three edits:
- Delete the first line,
version: '3'. Modern Compose ignores it and warns on every command. - Pin the image. The
baseservice (whichrailsandsidekiqboth inherit) readsimage: chatwoot/chatwoot:latest. Change it to the pinned tag. - Wire the database password to your
.env. Thepostgresservice ships with an emptyPOSTGRES_PASSWORD=. Point it at the variable you are about to set, so the database and the app agree on one password.
After the edits, those two lines read:
image: chatwoot/chatwoot:v4.16.0
- POSTGRES_PASSWORD=${POSTGRES_PASSWORD}
Compose reads the .env file in this directory automatically, so ${POSTGRES_PASSWORD} resolves to whatever you set there next.
Step 5: Set the secrets and the URL
Chatwoot needs three things filled in before it will start correctly: a signing secret, its public URL, and matching database and Redis passwords. Generate the random values with openssl — never type your own, and never reuse the examples:
openssl rand -hex 64   # for SECRET_KEY_BASE
openssl rand -hex 16   # for POSTGRES_PASSWORD
openssl rand -hex 16   # for REDIS_PASSWORD
Each command prints one hex string on its own line. Run all three; they are three different values, and each goes into the matching key below.
Now open .env and set these keys:
SECRET_KEY_BASE=<secret-key-base-hex>
FRONTEND_URL=https://example.com
POSTGRES_PASSWORD=<postgres-password-hex>
REDIS_PASSWORD=<redis-password-hex>
FORCE_SSL=false
Three of these trip people up:
SECRET_KEY_BASEsigns sessions and cookies. It must be long and alphanumeric — theopenssl rand -hexoutput is exactly right. If it is blank, the app will not stay logged in.FRONTEND_URLmust be the fullhttps://address your users will visit. Chatwoot bakes it into email links, the chat widget snippet, and OAuth redirects, so a wrong value here produces links that point at the wrong place long after the install “worked”.FORCE_SSLstaysfalse. Nginx, not Rails, terminates TLS in this setup (Step 6), and it is what redirects HTTP to HTTPS. Leave the redirect to the proxy and keep this off; turning it on as well is a common source of redirect loops behind a proxy.
Leave REDIS_URL=redis://redis:6379 and the POSTGRES_HOST=postgres defaults alone — those names are the container hostnames on Compose’s internal network, not something you change.
Step 6: Prepare the database
Chatwoot has a dedicated task that creates the database, loads the schema, and seeds it in one go. Run it once, before the first start (and again after every upgrade). It is not the same as a plain rails db:migrate:
docker compose run --rm rails bundle exec rails db:chatwoot_prepare
The first run pulls the images, so it takes a few minutes. It ends with the database created:
postgres:5432 - accepting connections
Database ready to accept connections.
Bundle complete! 151 Gemfile dependencies, 296 gems now installed.
Created database 'chatwoot_production'
Step 7: Start Chatwoot
Bring the whole stack up in the background:
docker compose up -d
Give Rails 30–60 seconds to boot, then check the containers:
docker compose ps --format 'table {{.Service}}\t{{.Image}}\t{{.Status}}'
All four services should read Up:
SERVICE    IMAGE                       STATUS
postgres   pgvector/pgvector:pg16      Up About a minute
rails      chatwoot/chatwoot:v4.16.0   Up 30 seconds
redis      redis:alpine                Up About a minute
sidekiq    chatwoot/chatwoot:v4.16.0   Up 30 seconds
Then hit the local health endpoint:
curl -sI http://localhost:3000/api | head -1
It answers with a 200:
HTTP/1.1 200 OK
A 200 from localhost:3000/api means the app is alive and talking to the database and Redis. One thing that looks alarming but is not: if you run docker compose ps -a you will see a base container marked Exited (0). base is only a template the other services build on; it has nothing to run itself, exits cleanly, and you can ignore it.
Step 8: Put HTTPS in front with Nginx and Let’s Encrypt
Chatwoot answers only on 127.0.0.1:3000. Nginx sits in front, forwards to it, and holds the certificate.
Install Nginx and Certbot’s Nginx plugin:
sudo apt-get install -y nginx certbot python3-certbot-nginx
Create the site file. Two directives in here are Chatwoot-specific and easy to miss: underscores_in_headers on (Chatwoot’s API sends headers with underscores that Nginx drops by default), and the Upgrade/Connection pair (the live agent dashboard uses WebSockets):
sudo nano /etc/nginx/sites-available/chatwoot.conf
server {
    listen 80;
    server_name example.com;

    underscores_in_headers on;
    client_max_body_size 40M;

    location / {
        proxy_pass http://127.0.0.1:3000;
        proxy_http_version 1.1;
        proxy_set_header Upgrade $http_upgrade;
        proxy_set_header Connection "upgrade";
        proxy_set_header Host $host;
        proxy_set_header X-Real-IP $remote_addr;
        proxy_set_header X-Forwarded-For $proxy_add_x_forwarded_for;
        proxy_set_header X-Forwarded-Proto $scheme;
    }
}
Enable it, drop Nginx’s default site so it does not shadow yours, test the config, and reload:
sudo ln -s /etc/nginx/sites-available/chatwoot.conf /etc/nginx/sites-enabled/chatwoot.conf
sudo rm -f /etc/nginx/sites-enabled/default
sudo nginx -t
sudo systemctl reload nginx
The config test passes before the reload:
nginx: the configuration file /etc/nginx/nginx.conf syntax is ok
nginx: configuration file /etc/nginx/nginx.conf test is successful
Now let Certbot fetch the certificate and rewrite the site for HTTPS in one command. The --redirect flag adds the HTTP-to-HTTPS redirect for you, and --non-interactive (with --agree-tos) lets it run start to finish without stopping to ask questions:
sudo certbot --nginx -d example.com --non-interactive --agree-tos -m [email protected] --redirect
Certbot verifies the domain over port 80, installs the certificate, and finishes with Successfully enabled HTTPS on https://example.com. It also schedules automatic renewals, so you do not have to. From your own machine you can confirm both the redirect and the live certificate:
curl -sI http://example.com | head -1
The plain-HTTP address now redirects to HTTPS:
HTTP/1.1 301 Moved Permanently
If you need to tune the proxy further — HTTP/2, longer timeouts, rate limiting — Nginx Reverse Proxy with HTTPS on Ubuntu 24.04 (Let’s Encrypt) covers the Nginx side in depth.
Step 9: Create your admin account
Open https://example.com in a browser. On a fresh install Chatwoot sends you straight to a one-time setup screen to create the super administrator:
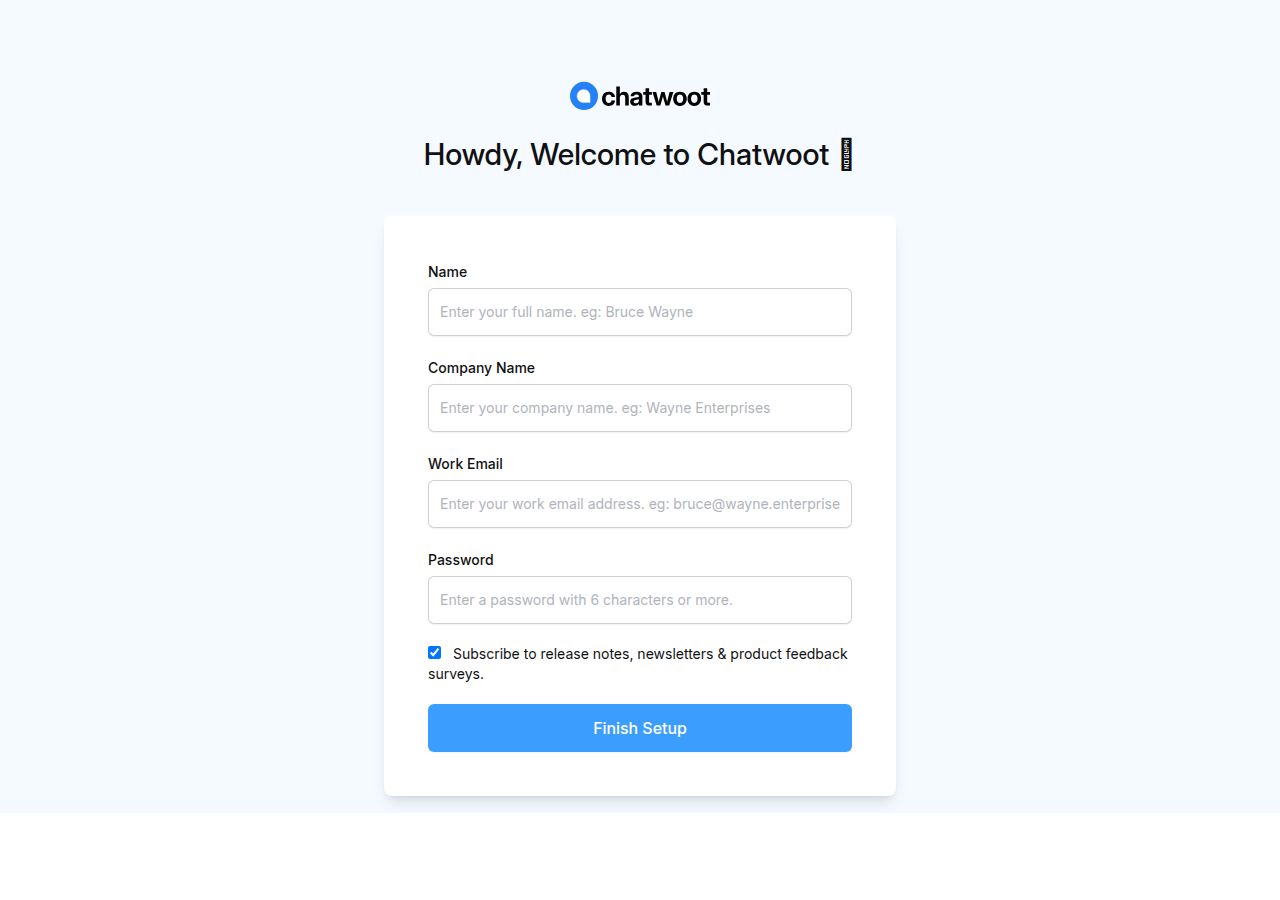
Fill in your name, a company name, the email you will log in with, and a password of at least six characters, then choose Finish Setup. Chatwoot creates the account and takes you to your workspace, where it confirms the details and lets you start setting up an inbox:
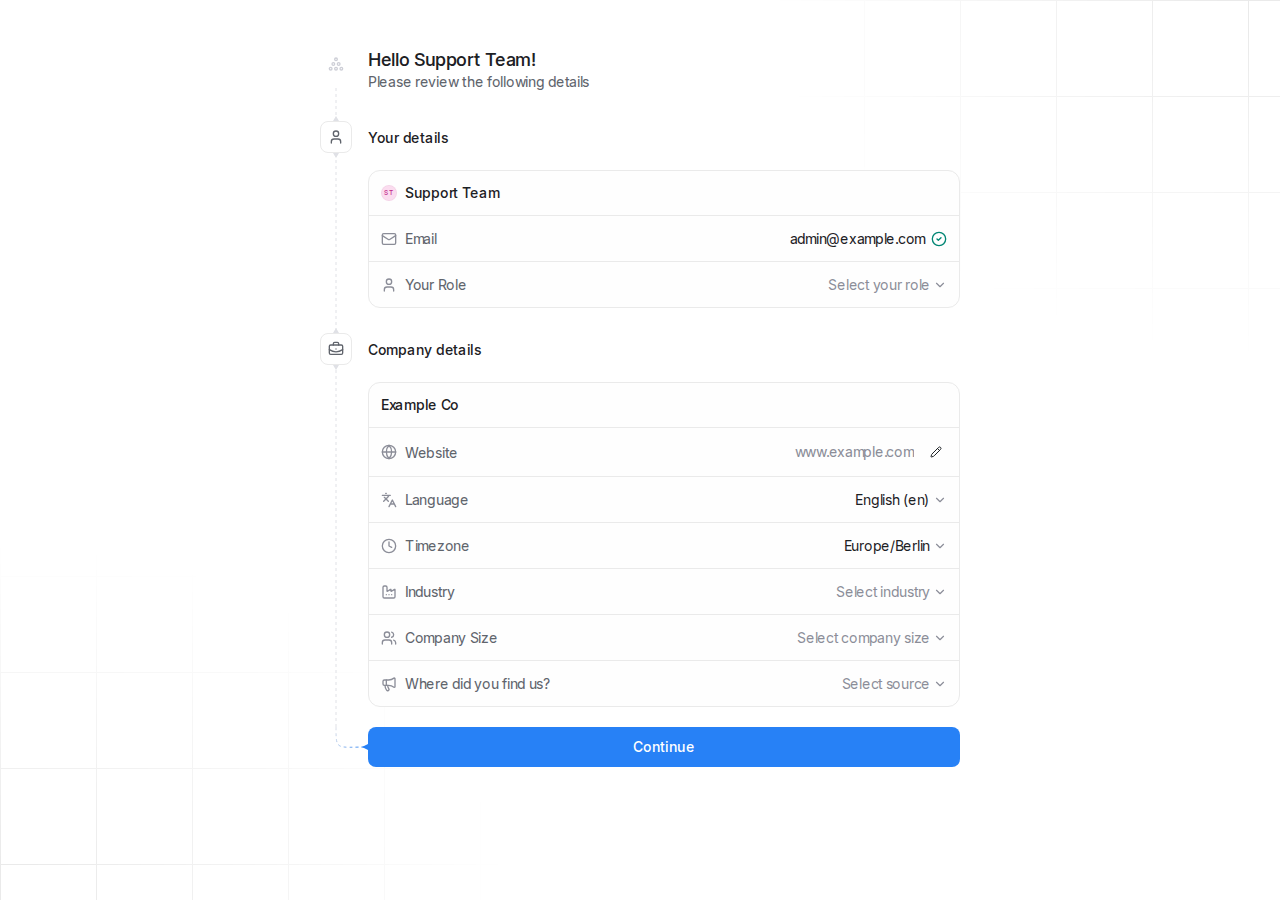
That screen means the whole chain works: TLS at the edge, Rails behind it, the database holding your account. From here you would add an inbox — a website widget, an email address, or a channel like WhatsApp — but the platform itself is installed.
Step 10: Confirm it survives a reboot
The restart: always policy in the compose file, plus Docker starting at boot, should bring everything back on its own after a reboot. For a service holding your customer conversations, that is worth confirming rather than assuming.
Reboot the server:
sudo reboot
Reconnect after a minute, return to the project directory, and check — without starting anything by hand — that Docker is enabled at boot and the app answers again:
cd ~/chatwoot
systemctl is-enabled docker
docker compose ps --format '{{.Service}} {{.Status}}'
curl -sI http://localhost:3000/api | head -1
Docker is enabled at boot, all four services are back, and the health check passes — without touching anything:
enabled
postgres Up About a minute
rails Up About a minute
redis Up About a minute
sidekiq Up About a minute
HTTP/1.1 200 OK
All four services return on their own and the health check passes. If any container is missing after a reboot, check that its restart: always line is intact in the compose file.
Step 11: Back it up and keep it current
Backups. Everything that matters lives in two places: the PostgreSQL database and the uploaded-file volume. From ~/chatwoot, dump the database with pg_dump straight from the running container:
docker compose exec -T postgres pg_dump -U postgres chatwoot_production > chatwoot-$(date +%F).sql
wc -l chatwoot-$(date +%F).sql
The dump is written, and wc -l confirms it has content:
9372 chatwoot-2026-07-21.sql
Copy that file, and the storage_data volume, somewhere off the server on a schedule.
Upgrades. Because you pinned the version, upgrading is deliberate and repeatable. Change the image tag in docker-compose.yaml to the new release, then:
docker compose pull
docker compose run --rm rails bundle exec rails db:chatwoot_prepare
docker compose up -d
The db:chatwoot_prepare step is the same one from Step 6 — Chatwoot requires it after every upgrade to apply new migrations. If you are jumping several releases at once, the official upgrade notes describe stepping through intermediate tags rather than leaping straight to the latest.
Where to run it
Chatwoot is comfortable on a small box, but it is a stateful service holding your customer conversations, so the two things that matter are steady memory and a disk you can grow.
On Lineserve Cloud Servers you build exactly the 2 vCPU / 4 GB footprint this guide runs on — set the vCPU and RAM, add the SSD you want, and the price is the transparent sum of the parts rather than a figure behind a sales form. That configurator is the right home for Chatwoot because you can grow RAM and disk as your conversation history builds, without rebuilding the server. If you would rather pick a fixed plan, the Linux VPS M1 preset matches that footprint at 2 vCPU / 4 GB / 80 GB SSD (from $42.40 / KES 4,240 per month). Both come with a dedicated IPv4, which is what the certificate in Step 8 needs.
Once Chatwoot is live, How to Self-Host Uptime Kuma for Free Server Monitoring with Docker is a natural next step for watching that it stays up.